Tuesday, July 14, 2015

Summer Shadow Box

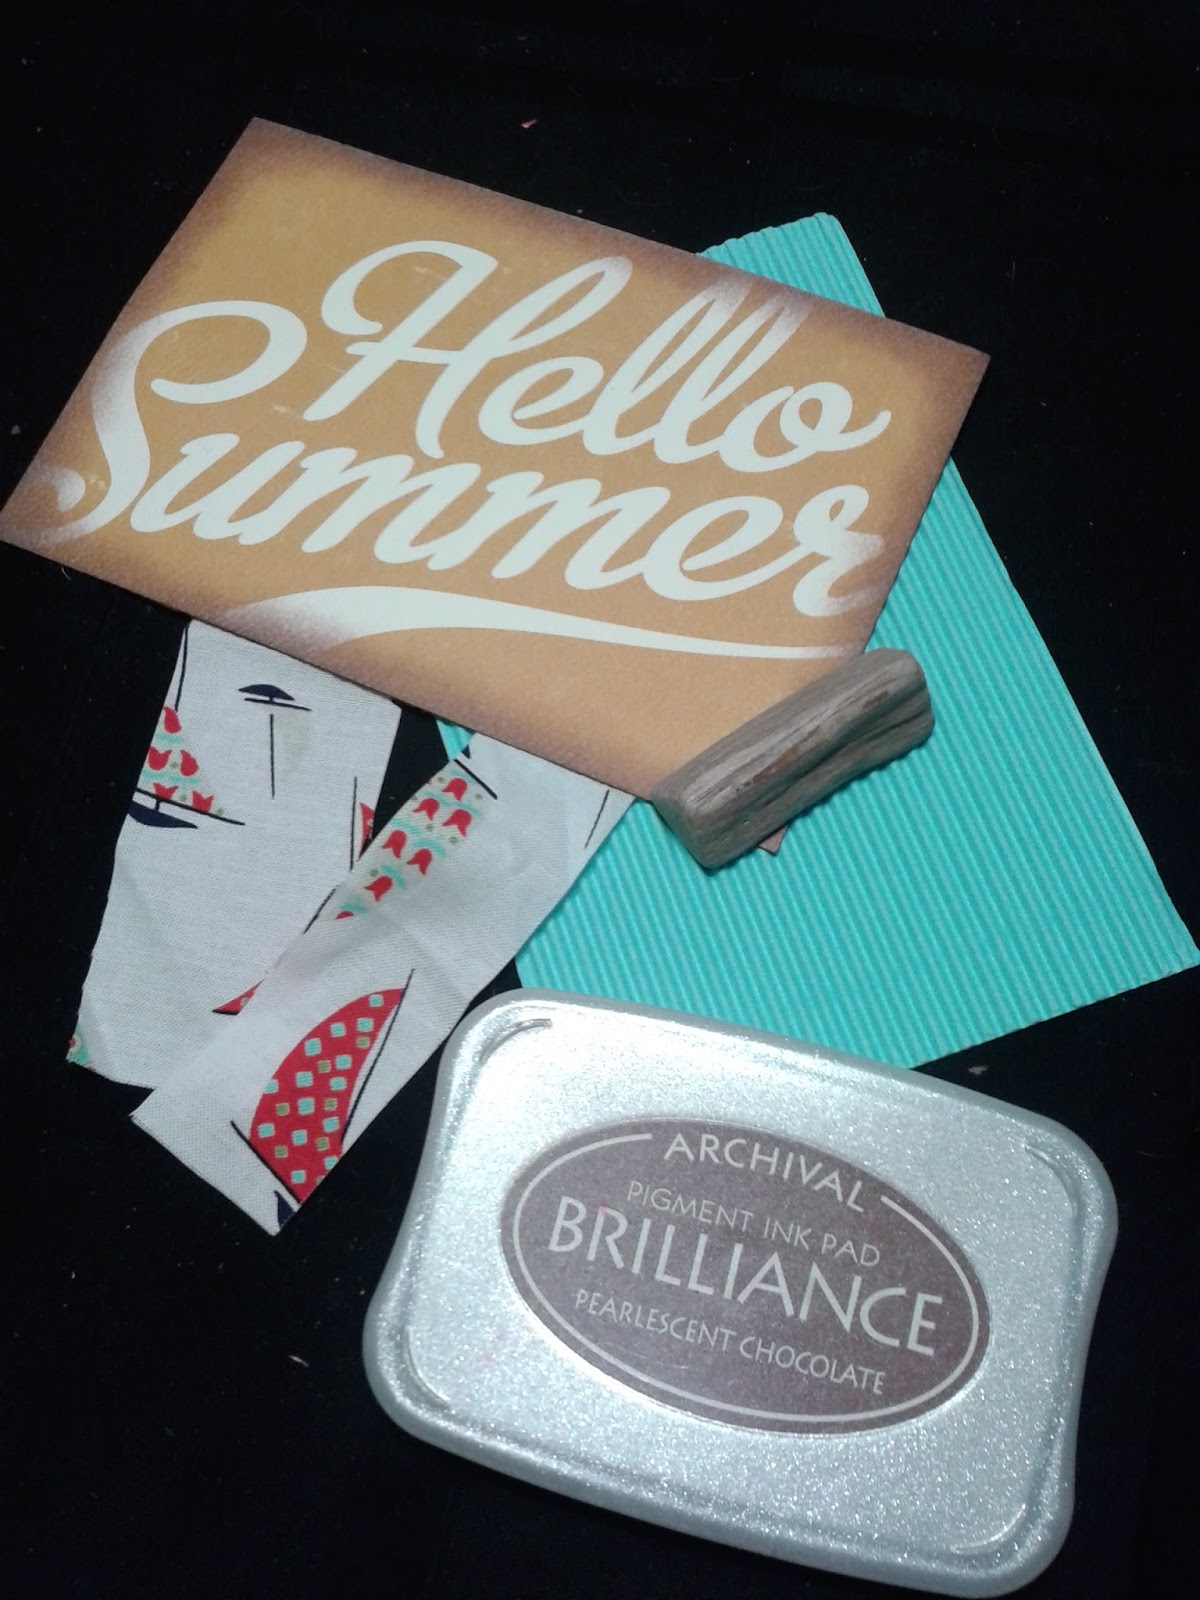
Once upon a time (i.e. last week), I got a challenge kit from my local craft store. In this challenge kit were a piece of sail boat fabric, a "Hello Summer" card, corrugated blue paper, and a piece of driftwood. The rules were to incorporate all items in some form into a non-card project. When the crafting itch hit me hard this week, I decided I wanted to tackle that challenge kit. Searching through my craft room, I found an old balsa shadow box I had picked up on sale. Bingo! That box was perfect for a piece that would include driftwood, and gave me a flash of inspiration!


I started my summer shadow box by sponging Tsukineko's Brilliance Pearlescent Chocolate ink around the edges of the "Summer" cardstock.

Next, I measured and cut the fabric to add to the two interior side walls of the shadow box. Being that my craft room doubles as our guest room, and we currently have a house guest, I cut corners and used some craft scissors to cut the fabric instead of digging my fabric shears out of the craft/guest room. Bad idea. It took much longer to get the straight lines needed, but at least I now know better for next time! I glued the fabric down with my handy bottle of Beacon 3-in-1 glue.

The balsa wood of the shadow box needed some base color, so I stained the interior top and bottom with Tim Holtz Tarnished Brass Distress Stain to emulate sand until I can add some real sand to the bottom. I covered the exterior of the shadow box with Picket Fence Distress Stain.


It took me a while to decide whether to utilize the corrugated blue paper to frame the outside face of the box, use it as "waves" inside the shadow box instead of sand, or to use it only on the small front lip outside the glass. I finally settled on the subtle hint of water provided by using the corrugated paper on the small front lip outside the glass, and was pleased with the results. Framing the whole front would have been too much blue, and would have covered over the beachy white-washed look that the Picket Fence Distress Stain provided.


The semi-final product (at least until I can get my hands on some real sand and hunt down my collection of West Coast shells from my summer road trip):


UPDATE: with the sand & shells added!


Entered in the:
Artistic Inspirations - challenge #135
Craft Your Passion - challenge #270
Crafting By Designs - July "anything goes" challenge
Crafting From The Heart - challenge #68
Crafty Catz - challenge #287
Crafty Girlz - challenge #3 
Create and Inspire - challenge #25
Creative Fingers - challenge #87
Glitter N Sparkle - challenge #145 
Make My Monday - anything but a card challenge
Not Just Cards - challenge #22
Scrapper's Delights - challenge #46 
Sisters of Craft - July "anything goes" challenge
Suzy Bee's Bloomin' Challenge #88 - Top 3!
The Crazy Challenge #201
Word Art Wednesday - challenge #191 
Your Scrapbook Place - July "anything goes" challenge

Sunday, May 31, 2015

Quick Bestie Bday Card

Ah, the variety of papers, patterns, stamps, and embellishments we have for papercrafting! Most cards I make take hours because of the sheer variety of choice. This card, however, was a piece of cake. A sentiment journal card from the Authentique "Beauty" journal card stack was my starting inspiration for this birthday card, one that I needed immediately in order to send out my bestie's birthday package that same day. Starting with that solid inspiration, this card only took me about 30 minutes from start of design to completion.


Quickie card steps:
  • Cut strip of aged yellow polka dot scrap paper
  • Inked edges of ivory card base, scrap paper, and journal card using Tim Holtz Tea Dye Distress ink
  • Apply strip of bird & cage washi tape to left edge of card front
  • Gluestick & adhere yellow polka dot scrap paper to card, then repeat with journal card
  • Use Beacon 3-in-1 to glue two layers of Recollections paper flowers to bottom right corner of card, add pearl to flowers
  • Stamp interior sentiment (from Close To My Heart)
  • Done!


Entered in the:
Crafting From The Heart challenge #61 - anything goes
Dream Valley Challenges #107 - anything goes
Fairytale Challenge #118 - Feathers & Wings
Fantasy Stampers Challenge Blog #37 - Wings & Things
Not Just Cards challenge #20 - anything goes
Word Art Wednesday challenge #185 - anything goes

Sunday, May 24, 2015

Pearlescent Sympathy Card

This week I made my first sympathy card. It was a spur of the moment endeavor with a short deadline, and it was my new Spellbinders Cascade Dots cover die plate that inspired the design. Start to finish, including design time, was about an hour.


I started with an ivory card base and sponged Tim Holtz Vintage Photo Distress, Tim Holtz Tea Dye Distress plus Color Box Silver inks in consecutive layers onto the card base. The second layer of pearlescent paper is from the DCWV Luxury Stack, die cut with Spellbinders Cascade Dots cover die plate and the edges inked with Tim Holtz Vintage Photo Distress ink for added contrast. The second layer was adhered to the inked card base with plain ol' glue stick. Handy stuff, that.

My dear husband helped me out by wrangling the printer to produce the sentiment on ivory cardstock while I was putting together the first layers of the card. This was my first time using a printed sentiment, which I resorted to since I was working with a limited craft stash (and working out of packed moving boxes), so I didn't have my usual selection of sentiment or alphabet stamps. Two quick scissor cuts added the banner notch to make the sentiment flag. Beacon 3-in-1 glue adhered the sentiment flag and the two Petaloo velvet flowers to the front of the card.

About five minutes after I glued down the sentiment flag, I realized that had my brain been fully engaged, I would have used pop-dots to float either the second die-cut paper layer or the sentiment flag on the card. Next time!


Entered in the:
4 Crafty Chicks "sympathy" challenge #247

Crafting By Designs "sentimentally" challenge 
Craft Your Passion challenge #262 - anything goes 
Crafting From The Heart challenge #60 - anything goes
Party Time Tuesdays challenge #198
Sisters of Craft - May anything goes challenge
Craftyhazelnut's Patterned Paper May challenge
Crafts Galore Encore Challenge - May anything goes
Your Scrapbook Place - May anything goes
Not Just Cards challenge #19 - anything goes - Winner!
Crafty Girlz Challenges, challenge #2 - anything goes
Scrapper's Delights challenge #44 - anything goes
Create and Inspire challenge #22 
Creative Fingers challenge #81 - anything goes
Sister Act Card Challenge #107
Word Art Wednesday challenge #184 - anything goes
Scribble and Scrap Challenge #45 - anything goes

Saturday, February 7, 2015

Measure the Moments, Not the Time

This card was originally made solely for the Flonzcraft Fashionable Stamping Challenge #90 - Numbers, and then I discovered A Step In The Dark's "dark side challenge blog". It's nice to see a crafting blog move away from the cutesy and into the grotesque.

I loved making this card because it gave me a good reason to use my Flonzcraft crying skeleton stamp. I have the crying, praying, and thinking skeleton stamps; I love all three!

Here's how this card came together:
  • Since I started with sepia & black inks and yellow measuring washi tape, I opted to use a Kraft card base.
  • Tim Holtz Tea Dye Distress Ink sponged lightly to color the front card edges, then dry embossed the card using the Darice ruler embossing folder.
  • Flonzcraft crying skeleton stamp in the Holtz Tea Dye on a Walmart (i)Phone Sticky Note.
  • Used one of the StudioG Series 4 Alphabets to stamp the sentiment "measure the moments" in ColorBox black pigment ink, and lightly smeared all the inked letters.
  • After assessing how all the pieces were coming together, the Tea Dye over the dry embossing didn't tie the card together well enough, so I sponge-wiped ColorBox black pigment ink lightly over the embossed design (don't currently have black dye ink on hand, and the pigment ink is too sticky and dark for light sponge applications).
  • Used scissors to mildly distress the edges of a piece of black DCWV Glitzy Glitter cardstock 1/4" larger than the Walmart Phone Sticky Note, taped & glued both papers together and down to card, added a piece of measuring washi tape to the right side and a clear rhinestone on button of "phone".
  • Stapled three mini pheasant-like feathers together, adhered to card with two mini Glue Dots.


Entered in the:
Fashionable Stamping Challenge #90 - Numbers - Winner! 
A Step In The Dark's "Anything Goes" challenge #14
Crafts Galore Encore Challenge for February "Use a stamp or digi"
Inspiration Destination "anything goes" challenge #19
Clear It Out Challenge "anything goes/anything goes"
Catch The Bug challenge "anything goes"
Your Scrapbook Place February challenge "anything goes/masculine card"
Party Time Tuesdays challenge #195 "anything goes"
Loves Rubberstamps challenge #137 "anything goes" 
Sister Act Card Challenge #92 "anything goes"
Crafting By Designs February Anything Goes Challenge
Crafting From The Heart Anything Goes Challenge #45
Brown Sugar Challenge Blog #132 "anything goes"
Creative Fingers Challenge #66 "anything goes"
Sisters of Craft February Anything Goes Challenge
Craft Your Passion Challenges #247 - February Anything Goes
Scrapper's Delights challenge #40 "Anything Goes" 

The Man's V-Day Card

Valentine's Day; it's only a week away and I have four VD/hearts/love themed challenges on my radar (Make My Monday, The Kraft Journal, Aud Sentiments, and STAMPlorations). Of course, getting my honey's card done was top priority. Any other Valentines I complete will just be gravy.

Here's the card I made for my man: I started out with the 24 SEVEN journal card as inspiration. This called for a larger card base, so I upcycled food packaging cardboard to make a 6" x 6" base.


 Paper layers, from bottom up:
  • stash paper, mini brown & blue floral
  • scrap paper in yellow Moroccan print & musical tissue paper
  • journal card dyed with Tim Holtz Weathered Wood Distress Stain and triple-edged with stain to add depth; initial journal card wasn't too sturdy after being stained, so reinforced back with a layer of Kraft paper (Holtz stains are available cheaply from Joann Stores during sales or with coupons)
Embellishments:
  • gold adhesive arrow and twine glued into heart-shape over upcycled carpet pad netting
  • three layers of Recollections floral embellishments: pale mint green, yellow & green checked, and distressed black - tied with plastic straw-like material upcycled from gift packaging
  • finished off with one large champagne rhinestone, because I love the subtlety of champagne-colored bling


Entered in:
Make My Monday "Hearts and Flowers" challenge
The Kraft Journal's "Valentine's" challenge #209
Fairytale challenge #100 "Something with a heart"
The Crazy Challenge #190 "Love"
Naughty or Nice Challenge #12 "Love/Anti-Love"
Inspiration Destination "anything goes" challenge #19
Clear It Out Challenge "anything goes/anything goes"
Catch The Bug challenge "anything goes"
Craftyhazelnuts Patterned Paper February 2015 challenge
Your Scrapbook Place February challenge "anything goes"
Crafting By Designs February Anything Goes Challenge
Word Art Wednesdays Anything Goes Challenge #169
Crafting From The Heart Anything Goes Challenge #45 
Crafts 4 Eternity Recipe Challenge #212 "With Love" - Winner!
Creative Fingers Challenge #66 "anything goes"
Chocolate, Coffee & Cards Challenges #84 "Love Is In The Air"
Sisters of Craft February Anything Goes Challenge
Craft Your Passion Challenges #247 - February Anything Goes
Artistic Inspirations challenge #124 "Anything Goes With a Twist of Hearts"
Creative Moments challenge #61 "Anything Goes/Love"
Scrapper's Delights challenge #40 "Anything Goes"